


Absolute Beginner's Guide To Getting Started With Raspberry Pi
Contents:
- Introduction
- Simplifications
- Decisions
- The Raspberry Pi
- Parts: What You Need
- Suppliers: Where To Order
- Shopping Lists: What To Order
- Table 1: Raspberry Pi
- Table 2: Raspberry Pi Kits
- Table 3: Electronics Parts
- Table 4: Office Equipment
- Connecting Everything
- Booting Up
- Copying The Micro SD Card
- USB Sticks
- Where To Find Help
Introduction
The Raspberry Pi is a great little computer for learning programming in general, as well as embedded systems. It runs a version of the Linux OS (Operating System) called Raspberry Pi OS (formerly called Raspbian, so you'll see that name a lot, including here), supporting multiple programming languages. It can be used as a full desktop computer.
But if you're an absolute beginner, the information can get overwhelming quickly. There are different versions of it, different software to run on it, and all kinds of things to connect to it. Where do you even start?
By "absolute beginner", I mean someone who knows how to browse the web and do basic word-processing and maybe use some of the other programs on a typical desktop, laptop, or tablet computer, but that's really all. If you know more than that, it's helpful but isn't a prerequisite here.
You may find some of the photos and descriptions overly detailed. But for someone who's never worked with things at this level, it's all new.
Sometimes even the simplest thing can be a roadblock when learning a new thing. We tend to forget that once we gain experience. One of my primary goals here is to remove roadblocks.
This tutorial shows the simplest way to get started, covering just the basic essentials. I'll use it as the foundation for other tutorials, where I'll assume you have a Raspberry Pi up and running. It covers:
- Raspberry Pi OS versions
- The Raspberry Pi hardware
- The parts you need
- What to order and where
- Connecting everything
- Booting up NOOBS v2.8 (Raspbian Stretch) or v3.1 (Raspbian Buster)
- Recovery mode
- Copying the Micro SD card
- USB sticks
- Where to find help
- Using Linux, from basic to advanced.
- Programming in C, C++, Python, Bash, and many other languages.
- Communicating with remote devices and systems over serial and network interfaces.
- Controlling electronic devices connected to the pin headers.
- Using the Pi as a cross-development host for programming other embedded system boards running bare-metal, Linux, or RTOS (Real-Time Operating System).
To me, this really unleashes the potential of modern electronics and computing, made accessible to those who have the drive and perseverence to learn them. It's a real investment in your future.
Simplifications
There are many ways to go about this and many other tutorials available. My focus is on simple, simple, simple.
The only thing you need another computer or smartphone for is to order some things online. Everything else is done on the Pi itself when you get it, and takes just a few minutes.
The biggest simplification here is that you'll order a memory card that has the software for the Pi pre-installed.
Many tutorials show how to download the software and program a card yourself, and that's a perfectly fine way to do it. But it adds complexity that may become a roadblock for an absolute beginner. Ordering the ready-to-use memory card removes that roadblock.
The other simplification is that the memory card boots directly into NOOBS (New Out Of the Box Software) on first use and then to the Raspbian desktop. Raspbian is the specific Debian distribution of Linux for Raspberry Pi.
Some cards and downloads allow you to select from multiple operating systems. This is a great way to try out different things, but again adds complexity. If you run into that, boot to Raspbian.
Raspberry Pi OS Versions
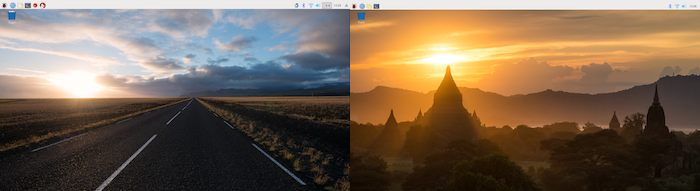
The most recent Raspberry Pi OS (formerly Raspbian) version releases are codenamed Stretch and Buster. You can identify them by their desktop background.
Here's Stretch on the left and Buster on the right:
You'll also see "Lite" versions of these releases. Don't use those here. The Lite part means they leave out the desktop GUI (Graphical User Interface) software. That's useful for Pi's that will act as servers or be embedded inside other things and don't need a GUI. But here we want the GUI, since we'll be using the Pi as a full desktop computer.
As an example of version issues, I had a memory card I had ordered some time ago with Stretch on it, but by the time I was writing this, the available memory cards had Buster. So part of this post uses Stretch, and part uses Buster.
For the most part for a beginner, the different versions just mean cosmetic differences. You'll see that you can do the same things on different versions, and you can move between Pi's running different versions easily.
The one real problem you might run into is that some specific Pi software released for Stretch may not have been updated for Buster, and won't work on it. For example, Shutter, the software I like to use for capturing and editing screenshots on Linux systems, is like that. Fortunately, both versions include the Scrot screenshot program, which captures the full screen image to a .png file when you hit the "Print Screen" key on the keyboard.
The name change from Raspbian to Raspberry Pi OS means that you should use both when searching for information. There's a lot of good information online using the old name.
See how quickly things can get complicated and confusing?
Decisions
We're going to setup the Pi as a full desktop computer, with display monitor, keyboard, and mouse. You'll be able to use it for programming and for general-purpose use just like a regular laptop or desktop computer.
You just need to make two decisions. The first one is whether you just want to stick to the programming part for now, or if you want to add the embedded systems part and get additional items for learning electronics. You can always add those later if you don't start off with them.
The second one is how much money you want to spend on the monitor, keyboard, and mouse.
The Raspberry Pi
I'm using a Raspberry Pi 3 Model B+. If you use a different model, some of the details may be a little different, but most of the information should be the same.
This is what it looks like, small enough to fit in the palm of your hand:
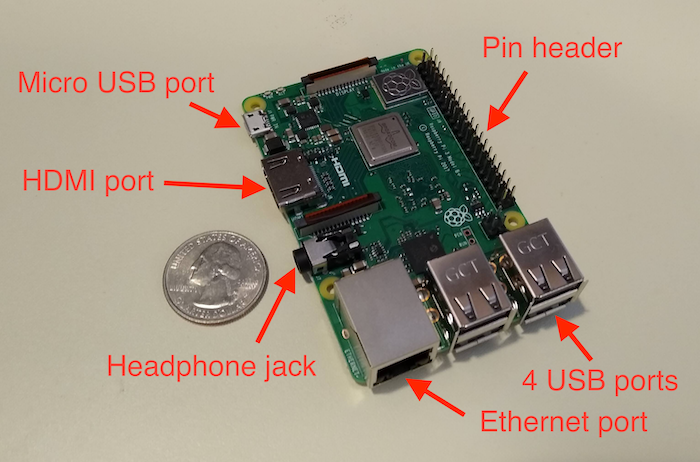
These are the various connectors on it:
- Micro USB port: this connects to the power supply.
- HDMI port: this connects to the display monitor.
- Headphone jack: this connects to headphones.
- Ethernet port: this connects via Ethernet cable to your network router (but the Pi also has built-in WiFi, so you probably won't need to use this).
- 4 USB ports: these connect the keyboard, mouse, and other devices such as memory sticks.
- Pin header: these pins allow you to connect various other electronics, used for embedded systems.
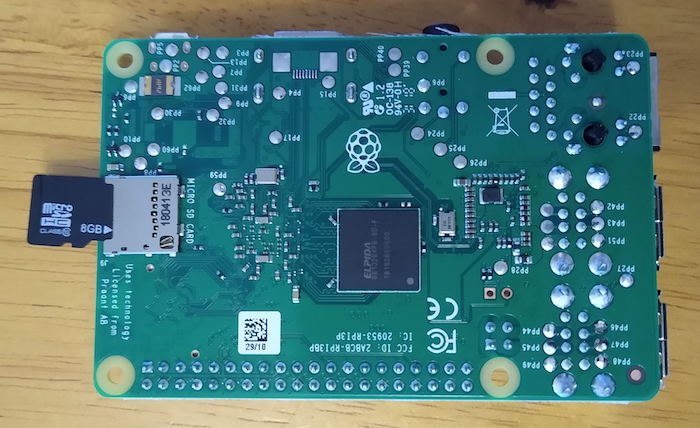
- Micro SD slot (not shown, on the back of the Pi): this is where you plug in the memory card with the Raspbian software.
ESD Safety
ESD (Electro-Static Discharge) refers to static electricity, the charge that makes your hair stand up or that gives you a little shock when you touch something metal.
ESD safety means protecting your electronics from static discharge. That little spark you see can potentially damage electronic components. When you're handling bare boards, everything is much more exposed to ESD.
The simplest way to protect your Pi is to touch something metal that you know will discharge your spark before you touch the Pi or anything connected to it.
Certain types of material in clothing can generate static charges. Wool, silk, and synthetic fibers like polyester and fleece typically do that. You really notice it when you pull a wool or fleece sweater over your head.
You can also buy ESD-safe mats that have wristbands. Place a mat on your work surface, and put all your electronics on that.
Parts: What You Need
You need the following hobby electronics and office equipment to use the Pi as a desktop computer (all prices in USD):
- Raspberry Pi board: $35-42, the Pi 3 Model B+ board pictured above.
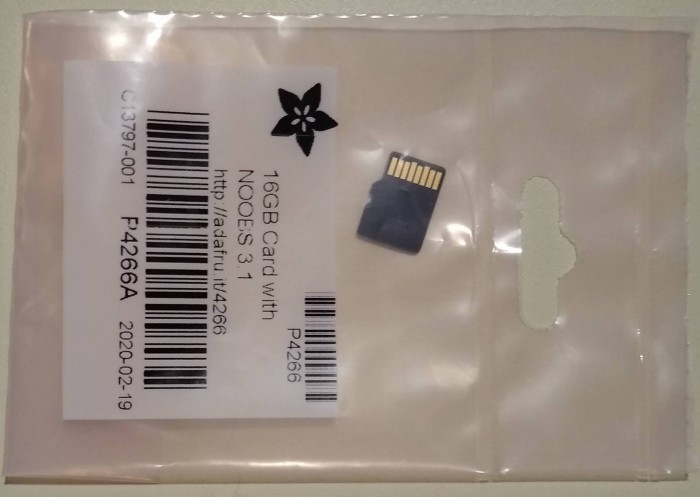
- MicroSD memory card with NOOBS and Raspbian: $10-15, 8-16GB, the software that runs the Pi. You can use either Stretch or Buster. These may be identified by the NOOBS version. Here I'm using NOOBS v2.8 with Stretch, and NOOBS v3.1 with Buster.
- Power supply: $7-10, provides power for the Pi board. It needs to have a USB Micro plug on the end (this is not the same as USB-C). It needs to be 5V, and provide enough power for everything you plug into the Pi (except the monitor, which will have it's own separate power supply). A plug strip with USB connectors also works well for this; then you need a USB cable with a USB Micro connector at the end for the Pi.
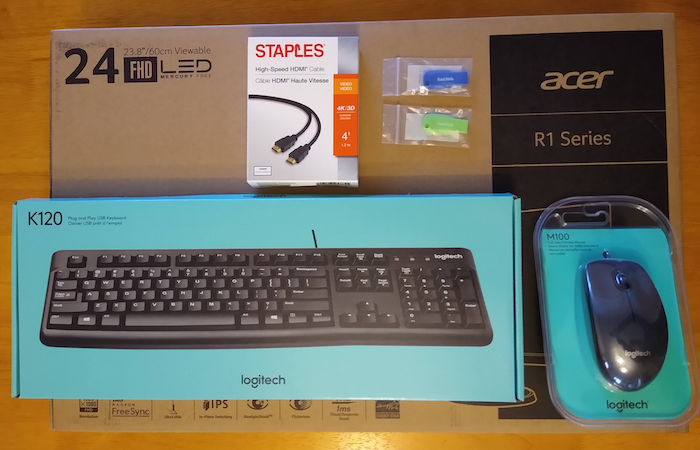
- HDMI monitor: $75-300, the display monitor, can be any size you want.
- HDMI cable: $7-15, the monitor cable.
- USB keyboard: $20-30, the keyboard. You can also use Bluetooth keyboard and mouse.
- USB mouse: $12-30, the mouse.
- USB stick: $12-15, extra flash drive storage for storing your files (it's good to have several, so you can make multiple copies in case you lose or damage one).
- Blank MicroSD memory card: $10-20, 32-64GB, for making a backup working copy of the NOOBS/Raspbian card.
- MicroSD memory card adapter: $7-15, for connecting the backup card.
The MicroSD card with NOOBS is also the main storage space for your files. However, you shouldn't use your pre-loaded card directly. Instead, you'll make a copy of it on the blank card and use that. Then you can store the original for safe keeping in case you ever have to recover it.
That means the amount of space on the original doesn't matter. It's the size of the blank card that determines how much storage space you'll have on your Pi.
Additional Items For Embedded Systems
If you want to play with embedded systems, you need at least these additional items:
- Breadboard: $5-20, to plug parts into.
- Jumper wires, male-to-male and female-to-female: $3-5, to connect parts, and can be chained together to make male-to-female. The sockets on breadboards require male end, the pins on the Pi require female end. Male-to-female jumpers are also available.
- Resistors: assorted values to control the voltage and current to parts (the Pi is a low-power device, so you don't risk electrical shock, but you do risk damaging parts).
- LED's: Light Emitting Diodes, the simplest kind of output device that you can control.
- Pushbuttons or switches: the simplest kind of input device that you can read.
- DMM: $12-$75, Digital Multi Meter for measuring resistance, voltage, and current. This is the basic electronics troubleshooting tool.
There are an infinite number of other parts you can add to this, like a variety of motors, alphanumeric displays, keypads, switches, encoders, and different sensors for detecting light, sound, temperature, humidity, and movement, plus all kinds of control and communications chips.
The easiest way to get started with electronics parts is to get a kit containing an assortment, $20-$60 depending on the things included.
Suppliers: Where To Order
There are two great websites in the US that cater to hobby electronics, Adafruit and SparkFun Electronics. In addition to parts, they have lots of educational resources. Industrial suppliers Digi-Key Electronics and Mouser Electronics also supply hobbyists in single- and small-scale orders; their websites can be a little more difficult to use, since they tend to be oriented to large-scale orders, and carry everything under the sun.
While I got all my Pi items from Adafruit, I've gotten things from all four of these sources. If you play with electronics, you'll use all of them. Digi-Key and Mouser are also distributors for both Adafruit and Sparkfun, so if an item is out of stock at the hobby supplier, you might be able to get it from the distributor.
There are also other hobby, educational, and distributor websites all over the world, and many items are available on Amazon. As of this writing, COVID19 is disrupting order fulfillment and supply chains, so some things may be out of stock temporarily at some suppliers. You may need to search different ones to get everything. Also, delivery to some areas may be suspended temporarily.
When ordering, pay attention to stock levels and lead times listed on the websites. If an item is out of stock, the lead time before more arrive may be weeks long.
Items like the monitor/cable, keyboard, mouse, blank MicroSD card and reader, and USB sticks can be found on consumer electronics and office supply websites. I've provided some links for simplicity, but you can certainly find alternatives, including combination packages.
Shopping Lists: What To Order
Just trying to create a simple shopping list is suprisingly complicated. I've put together just the items you need to simplify navigating through the websites. If you go to other websites, for instance outside the US, you can use the information on these pages to guide you.
The following tables list the items with their prices, by supplier (as of May 10, 2020); click on a price to open a new tab with that item's supplier order page.
- Table 1: Raspberry Pi: The main Pi items, individually.
- Table 2: Raspberry Pi Kits: You can also get the main Pi items in a kit.
- Table 3: Electronics Parts: If you'd like to learn electronics for embedded systems.
- Table 4: Office Equipment: The office equipment to use the Pi.
Table 1: Raspberry Pi
| Item | Adafruit | Sparkfun | Digi-Key | Mouser |
|---|---|---|---|---|
| Raspberry Pi 3 Model B+ | $35.00 | $39.95 | $39.38 | $41.46 |
| MicroSD Cards NOOBS 8GB | $9.95 | $9.95 | $9.95 | |
| MicroSD Cards NOOBS 16GB | $14.95 | $19.95 | $20.00 | $14.95 |
| Power supply | $7.50 | $7.95 | $13.75 | $9.40 |
These are the items I got from Adafruit (I later added the 16GB NOOBS v3.1 card):
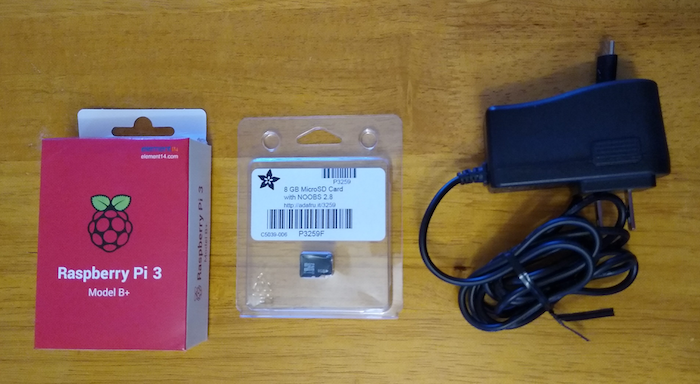
Table 2: Raspberry Pi Kits
An option is to buy a pre-packaged kit that includes all the items in Table 1 (including a MicroSD memory card adapter). There are two versions of this from CanaKit: a starter kit without parts for learning electronics, and an ultimate kit with them.
| Item | Canakit | Amazon |
|---|---|---|
| Raspberry Pi 3 Model B+ Starter Kit | $79.95 | $89.99 |
| Raspberry Pi 3 Model B+ Ultimate Kit | $89.95 | $109.99 |
Table 3: Electronics Parts
You'll need to look these over to see exactly what's in them; make sure you get at least the items listed above in "Additional Items For Embedded Systems". The suppliers offer multiple similar items in some cases, so you can look around at the different prices and availability. DMM prices vary widely; for initial educational use, you can get by with a very cheap one.
| Item | Adafruit | Sparkfun | Amazon |
|---|---|---|---|
| Basic Parts Assortment | $19.95 | $16.95 | $18.99 |
| Deluxe Parts Assortment | $49.95 | ||
| Resistor Assortment | $7.95 | $8.99 | |
| Breadboard | $5.00 | $5.95 | $5.99 |
| Jumper Wires, F-to-M | $1.95 | $1.95 | |
| Jumper Wires, M-to-M | $1.95 | $1.95 | |
| Jumper Wires, F-to-F | $1.95 | $1.95 | |
| Jumper Wires, combo | $6.49 | ||
| DMM | $74.95 | $14.95 | $10.32 |
Table 4: Office Equipment
You have lots of choices for these items, from a variety of sources. These are some recommendations at reasonable prices.
| Item | Amazon | Staples |
|---|---|---|
| HDMI monitor | $114.99 | $169.99 |
| HDMI cable | $7.00 | $9.99 |
| USB keyboard | $22.08 | $15.31 |
| USB mouse | $11.95 | $9.54 |
| USB stick | $23.85 | $24.99 |
| MicroSD card | $11.12 | $19.99 |
| MicroSD card adapter | $6.99 | $12.19 |
I got almost exactly these same items from Staples:
Connecting Everything
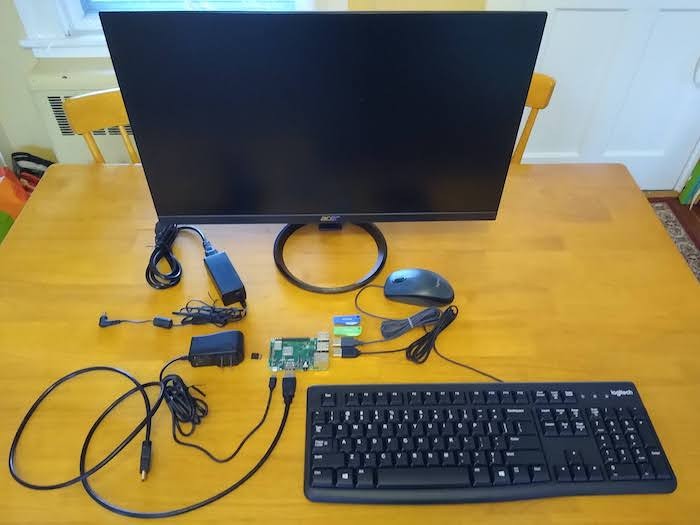
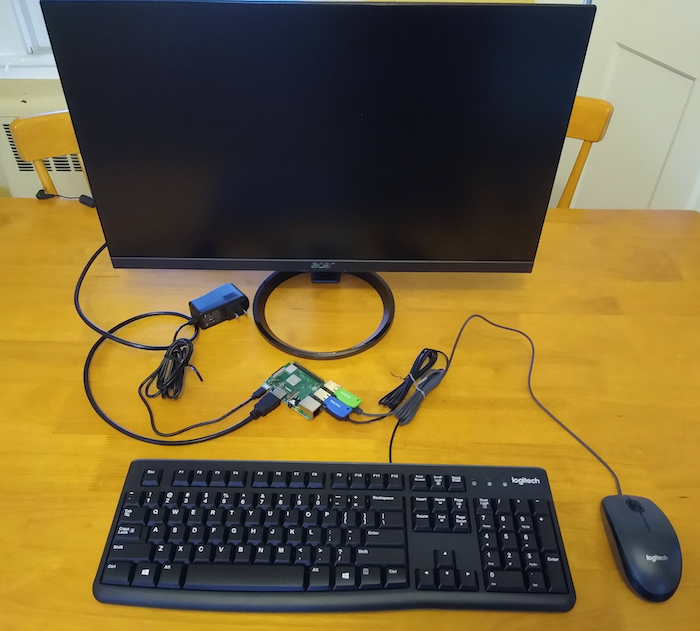
Unpack everything and lay it out on your desk or table:
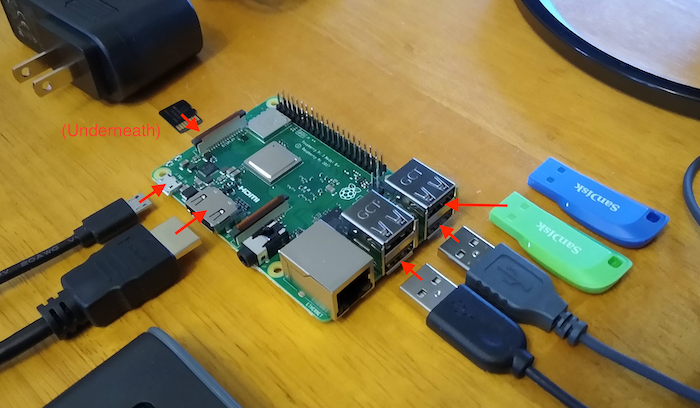
This is where things plug in, but don't plug them in yet. Notice that the micro SD card is upside down (the metal contacts are facing up) when the Pi is right side up:
To plug the card in, turn the Pi over and insert the card gently into the slot. The shape of the card is keyed, meaning it only fits into the slot one way. If it feels like the card isn't going in smoothly, you may have it turned the wrong way, and the keying is preventing it from going on. Play close attention to the photos (these show the 8GB NOOBS v2.8 card; the 16GB NOOBS v3.1 card plugs in exactly the same):
Push it all the way in:

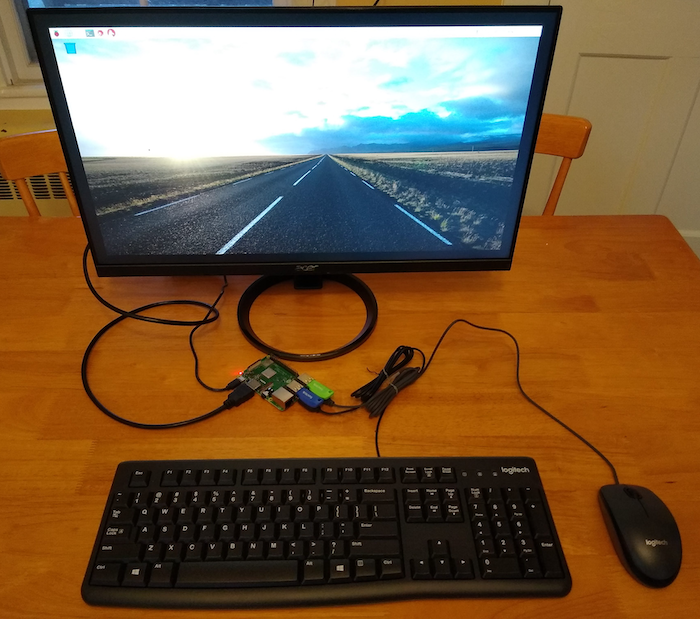
Don't plug the monitor or Pi power supply into the wall outlet yet. Turn the Pi back over and plug everything into it:
Booting Up
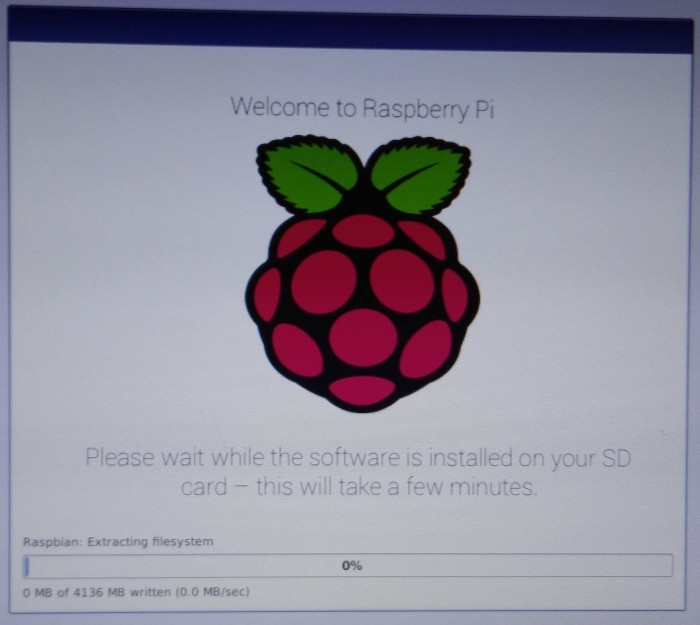
The subsections below show booting up Stretch and Buster on the NOOBS v2.8 and v3.1 Micro SD cards, as well as using recovery mode. Other versions of NOOBS should look similar. I didn't get a photo of the first power-on with the v2.8 card, but I got photos of everything else.
If the startup screen asks you which operating system you want to load, select Raspian for now. You can try out other systems later once you learn more about the Pi. You may see screens similar to those in Recovery Mode.
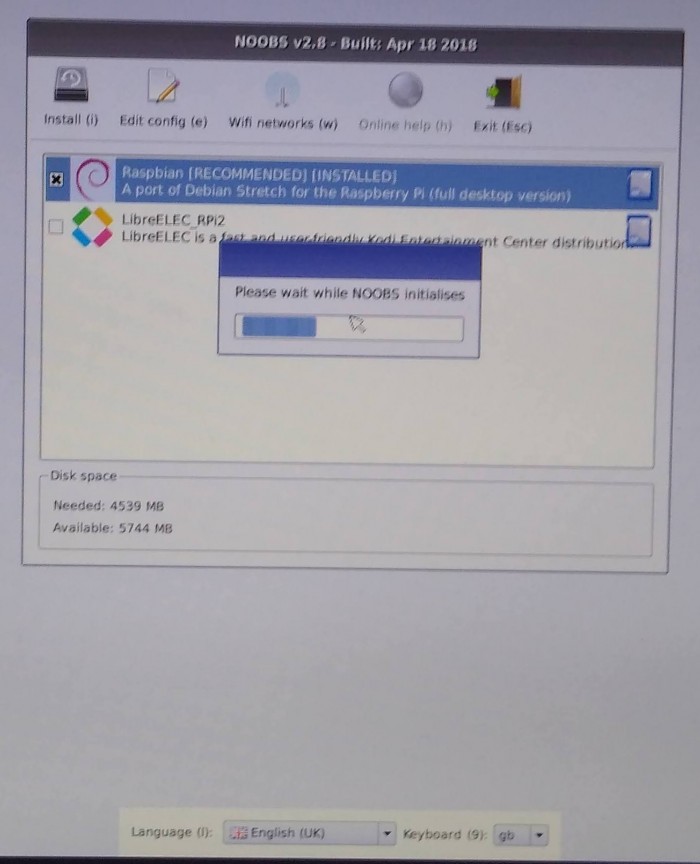
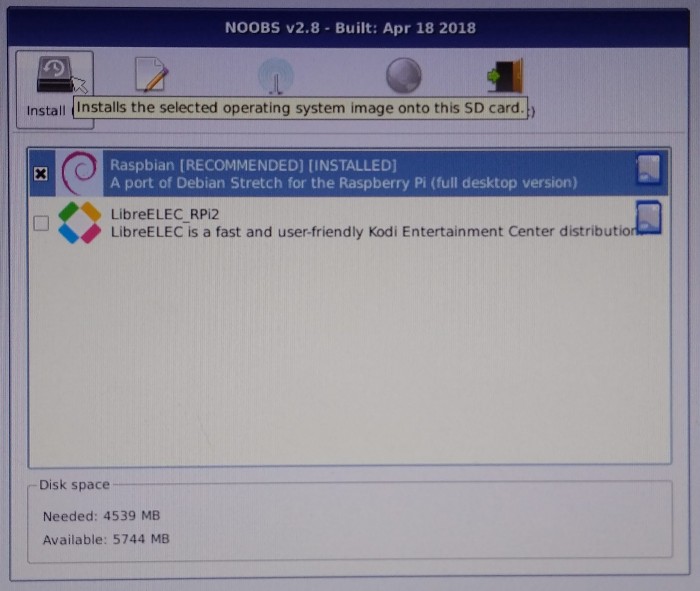
Booting NOOBS v2.8 With Stretch
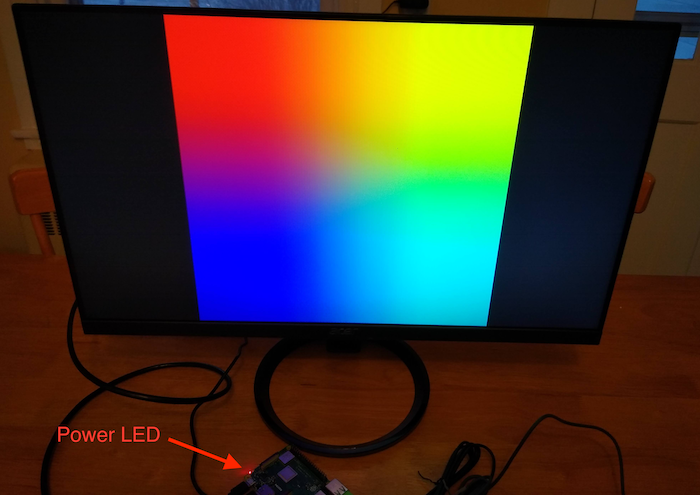
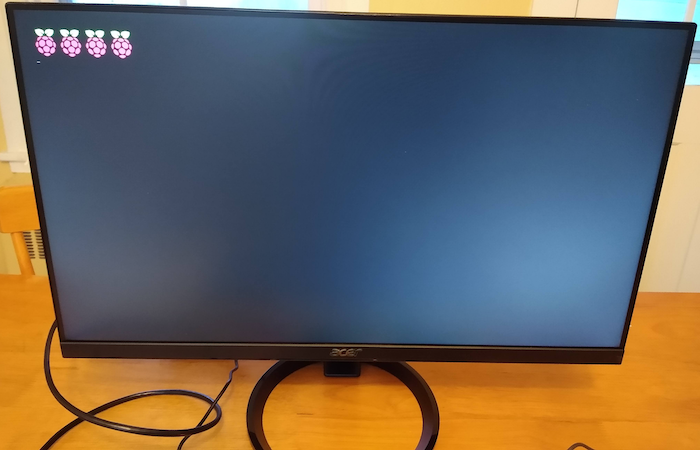
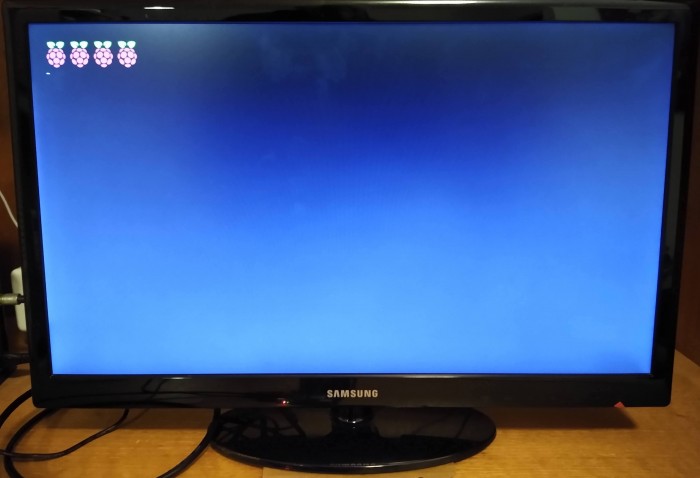
Plug the monitor into power and turn it on, then plug the Pi power supply in. Very quickly, the monitor should show this initial boot screen (notice the red power LED on the Pi is on):
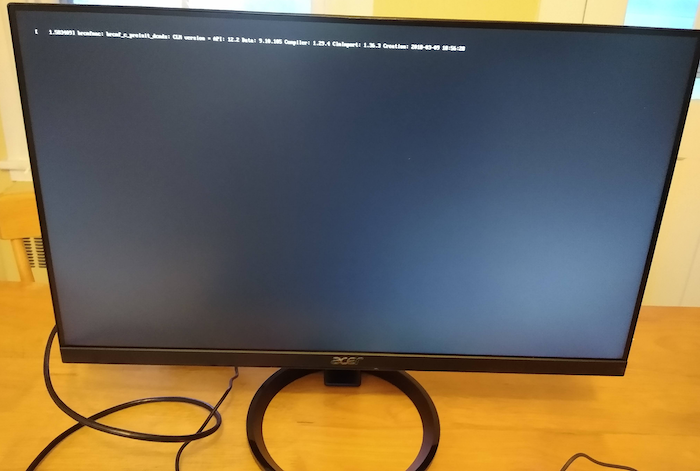
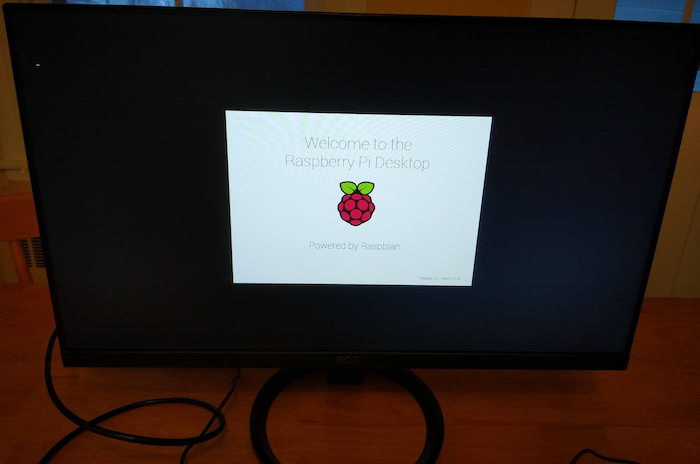
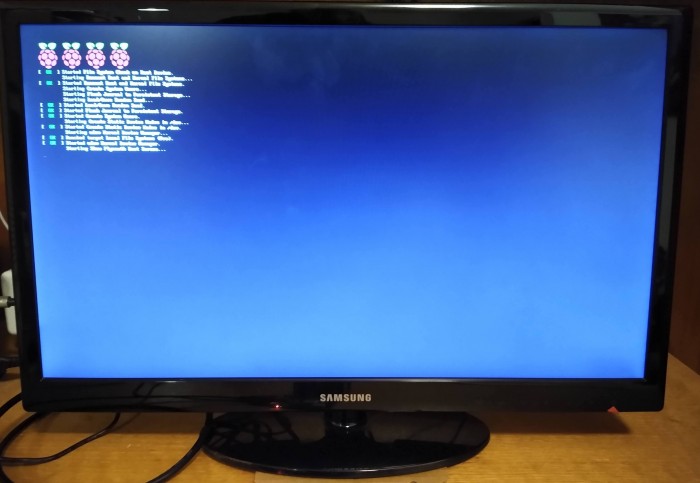
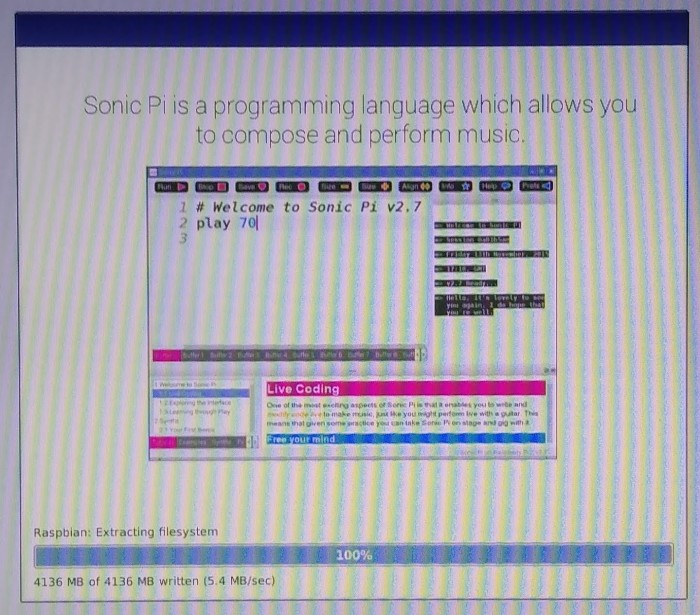
Then you should see this sequence of screens. Some may have more lines printed on them:
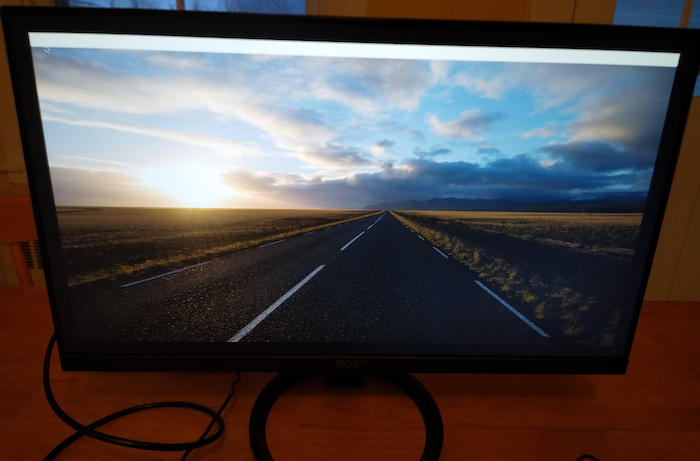
When it's fully booted and ready to go, you'll see icons in the top left:
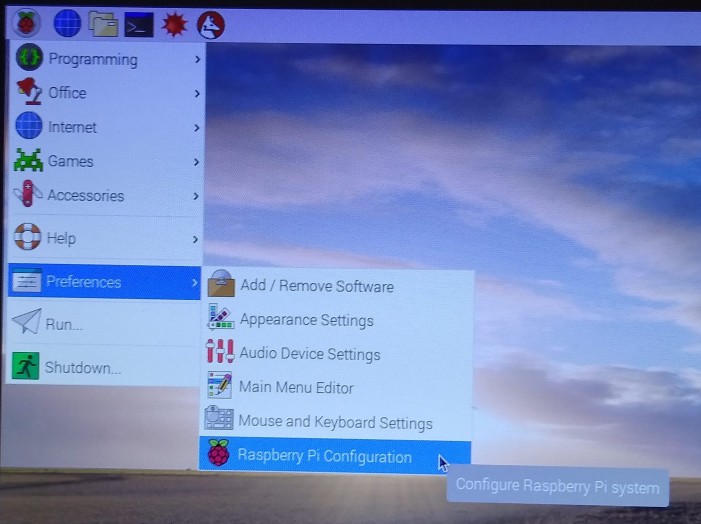
The first thing you need to do is configure the system for use, including connecting to WiFi (you can also plug in an Ethernet cable if you want to use that instead of WiFi). On the menu bar, click on the Raspberry Pi icon. On the menu that appears, move the mouse down to "Preferences". On the submenu that appears, click on "Raspberry Pi Configuration":
It will show this dialog box with the "System" tab. There are various settings you can change, including the default user Password and the system Hostname. The default username is "pi", and the default password is "raspberry".

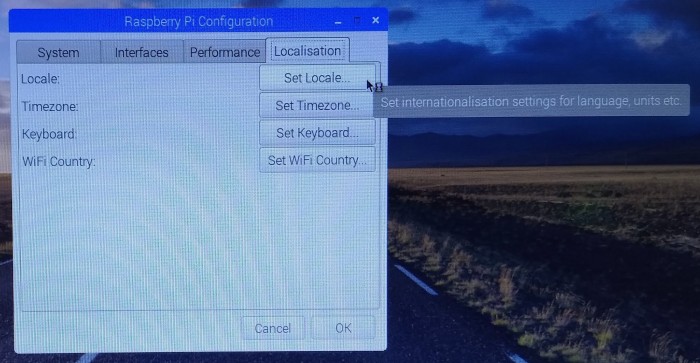
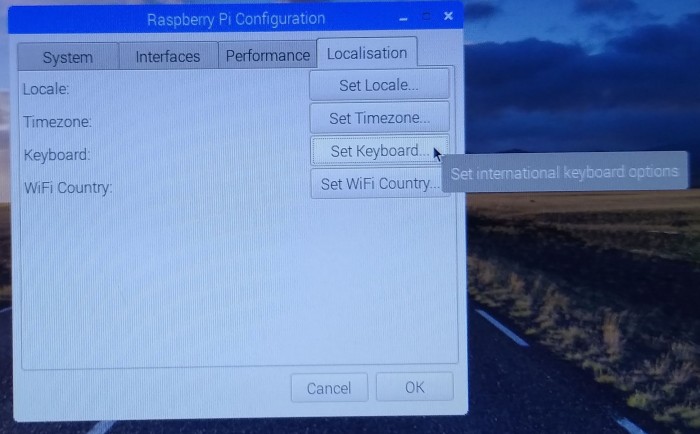
Click on the "Localisation" tab. This is where you can configure the system for your geographic location.
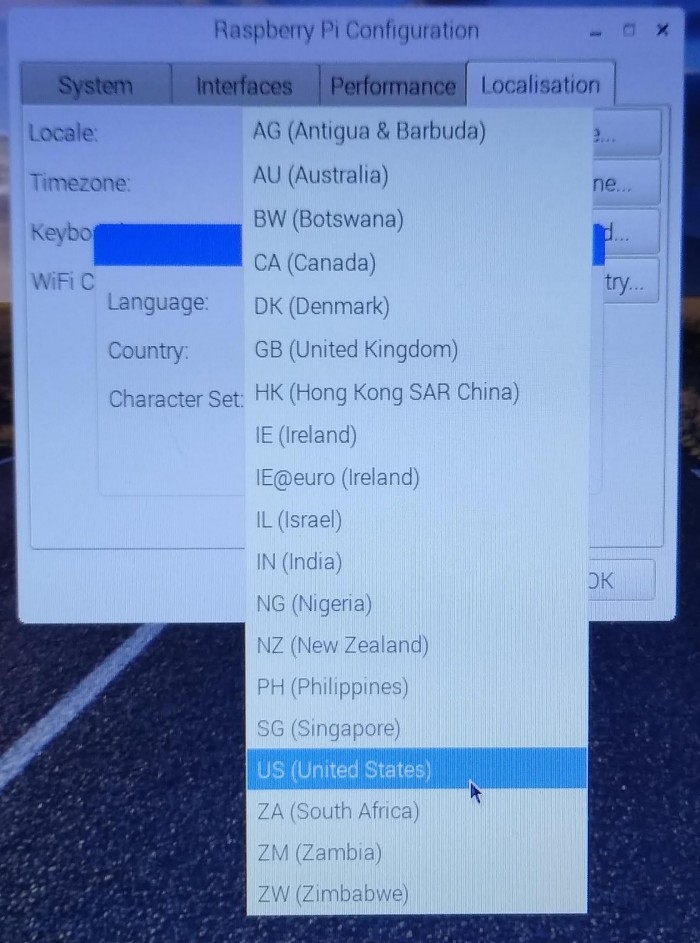
Click on the "Set Locale..." button. In the "Locale" dialog box, select your language and country and click on the "OK" button:
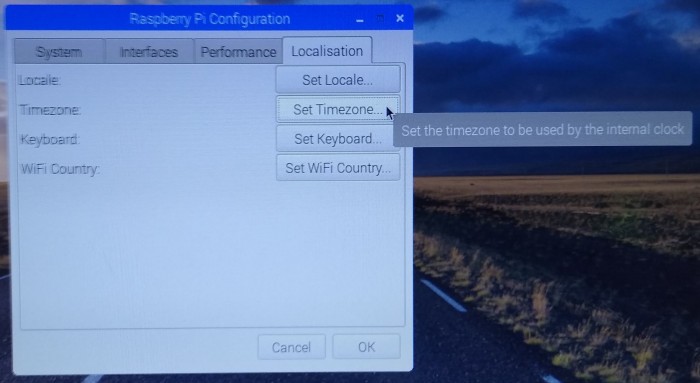
Click on the "Set Timezone..." button. In the "Timezone" dialog box, select your area and timezone and click on the "OK" button. I use the SystemV settings for area; I'm in the US Eastern Standard Time (EST), but I want to track Daylight Savings Time, so I select EST5EDT. The Pi may not display the correct time in the upper right corner until it has received a time synchronization message over the Internet.
Click on the "Set Keyboard..." button. In the "Keyboard Layout" dialog box, select the "Country" and "Variant", and click on "OK":

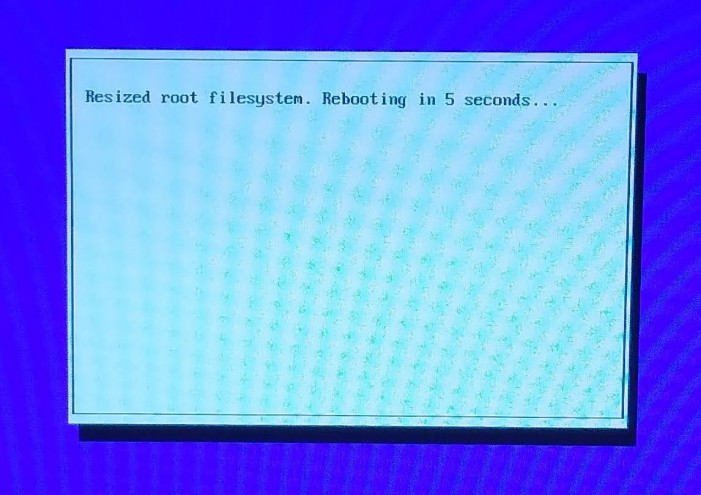
In the "Raspberry Pi Configuration" dialog box, click on "OK". It will display this reboot dialog:
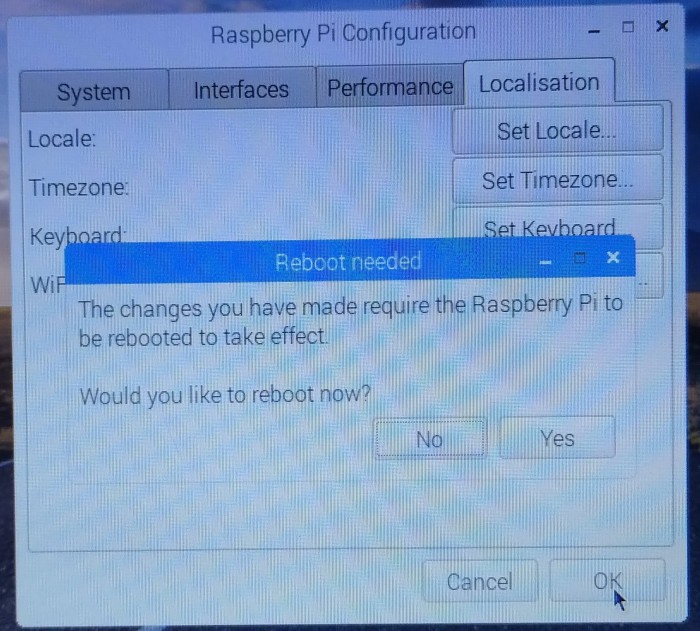
If you want to configure WiFi, click on "No". Otherwise, click on "Yes", and the Pi will reboot.
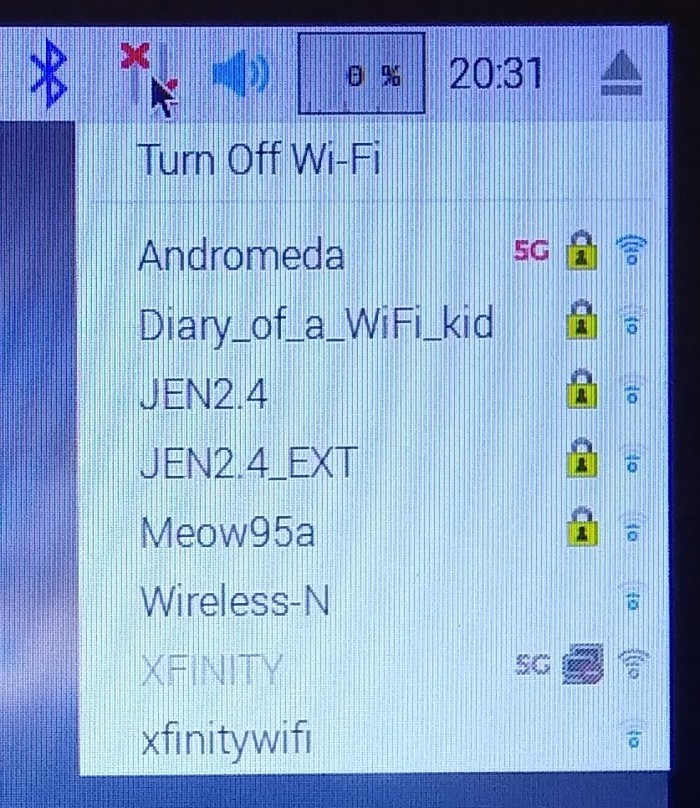
To connect WiFi, click on the WiFi icon at the right end of the menu bar (the X's on the icon mean it's not currently connected). It will list available AP's (Access Points). Mine is Andromeda (for The Andromeda Strain of course!).
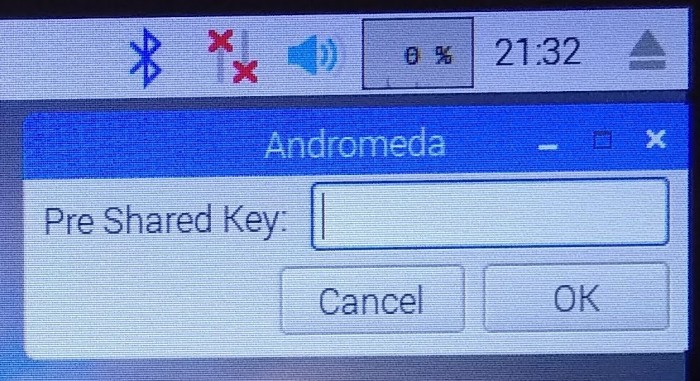
In the AP dialog box "Pre Shared Key" box, enter the WiFi password and click on "OK":
The Pi should connect to the WiFi and show the connected icon:
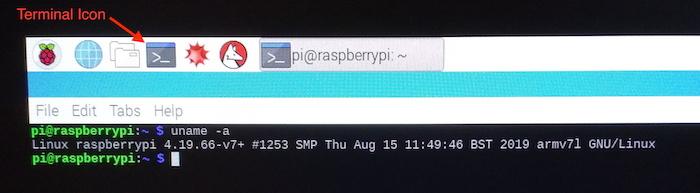
To see exactly which version of Linux you're running, click on the terminal icon in the menu bar, and enter the command "uname -a":
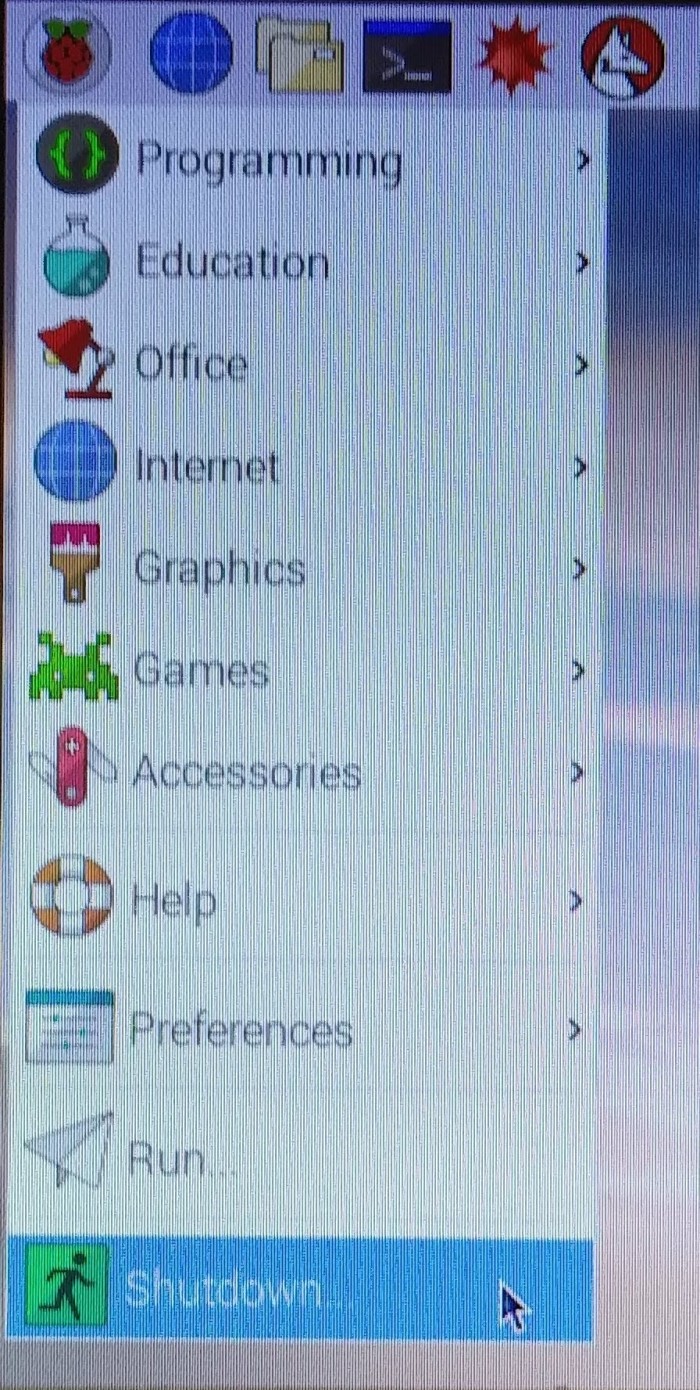
Now you can reboot the Pi so the configuration changes will take effect. Click on the Pi icon at the top left on the menu bar, and click on "Shutdown..." on the menu:
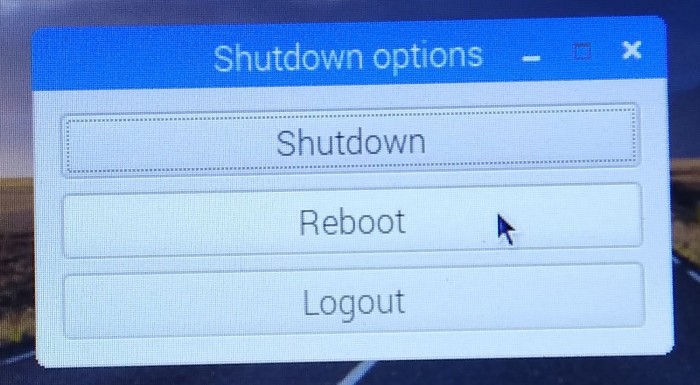
On the "Shutdown Options" dialog, click on the "Reboot" button.
Booting NOOBS v3.1 With Buster
Here's NOOBS v3.1 Micro SD memory card I got from Adafruit:
As shown above with NOOBS v2.8, with the Pi and monitor power unplugged, plug the card into the Micro SD slot on the underside of the Pi, and plug the monitor, keyboard, and mouse cables into the Pi.
Plug the monitor into power and turn it on, then plug the Pi power supply in. Very quickly, the monitor should show this initial boot screen:
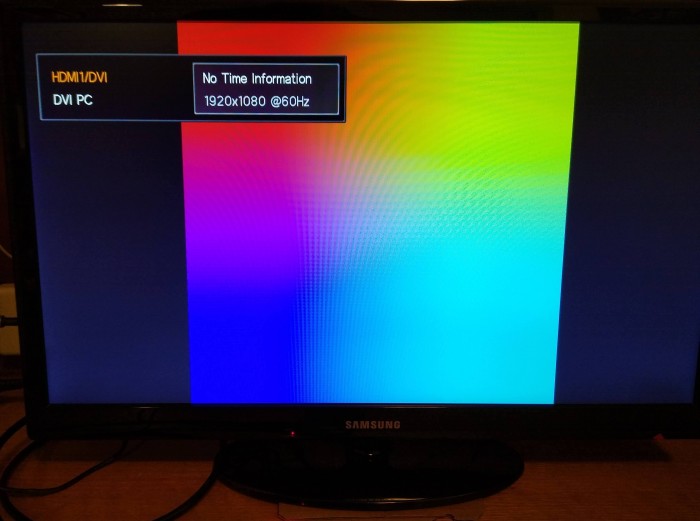
Here I'm using a different monitor, which displays that "No Time Information" message when it doesn't detect a signal. This message goes away after a few seconds once it has a signal.
Then you'll see the recovery mode screen:
Then you should see this sequence of screens. Some may have more lines printed on them:
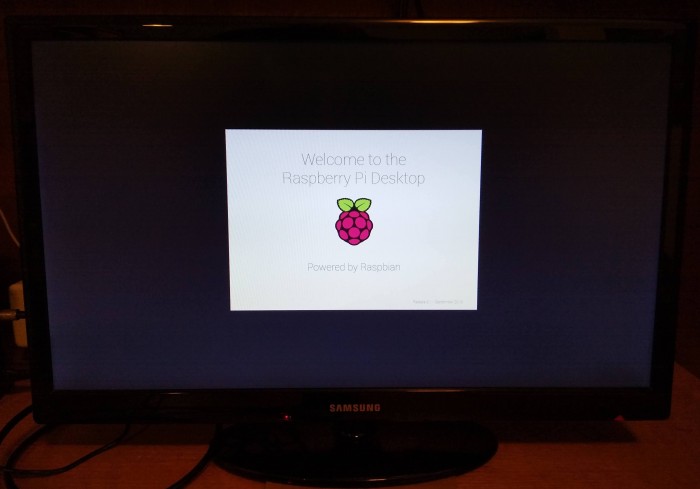
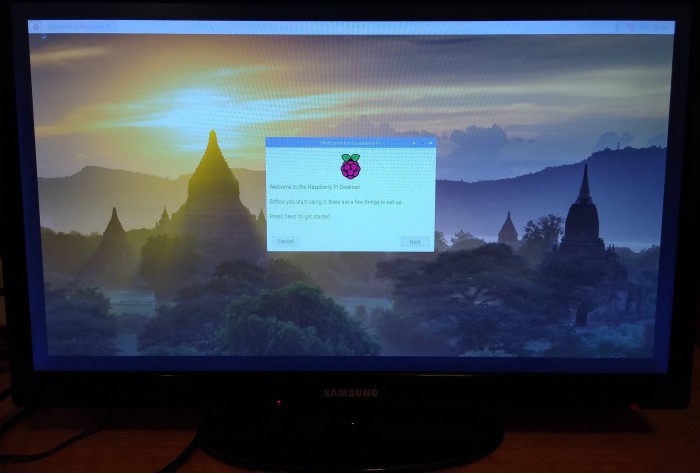
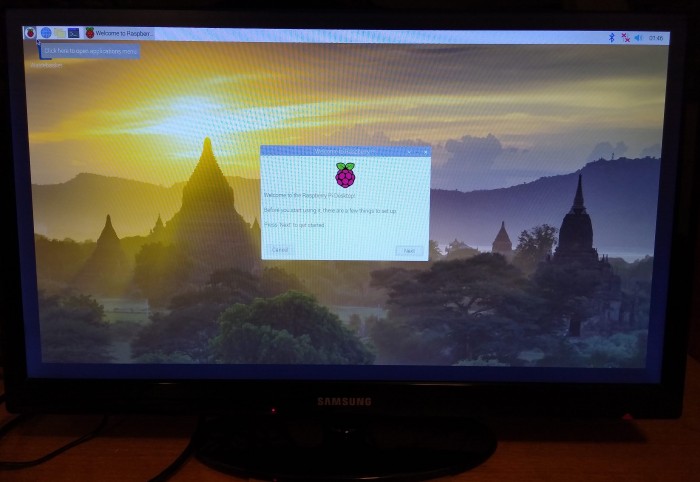
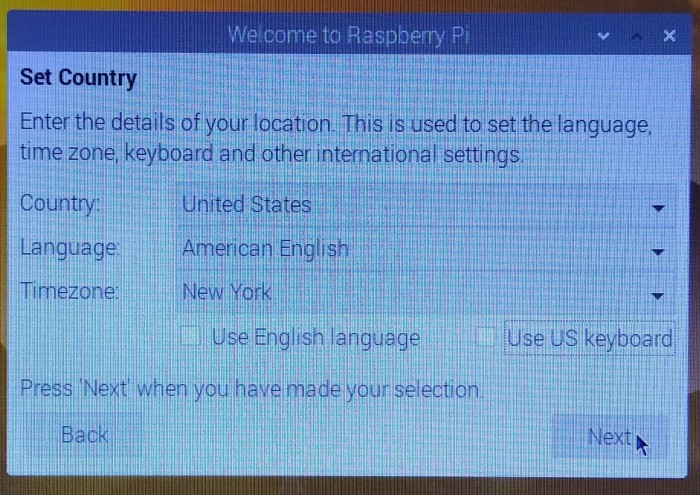
When it's fully booted, you'll see icons in the top left. However, it will take you through the "Welcome to Raspberry Pi" configuration first. Click on "Next":
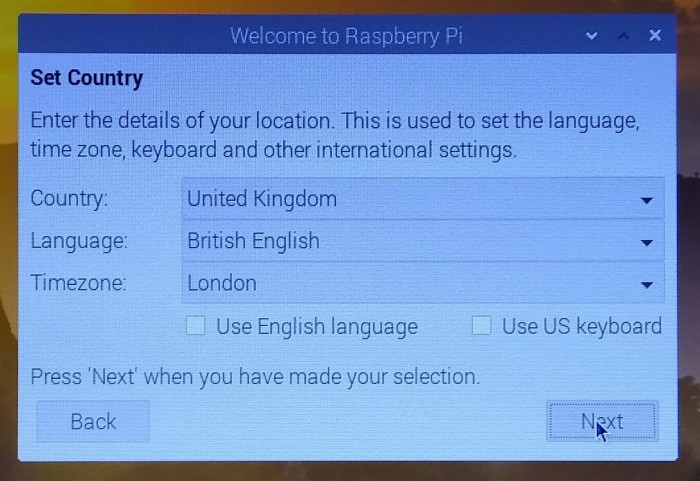
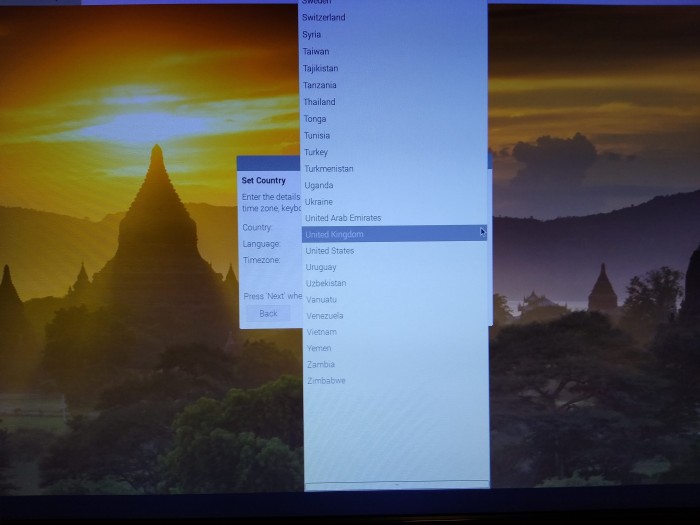
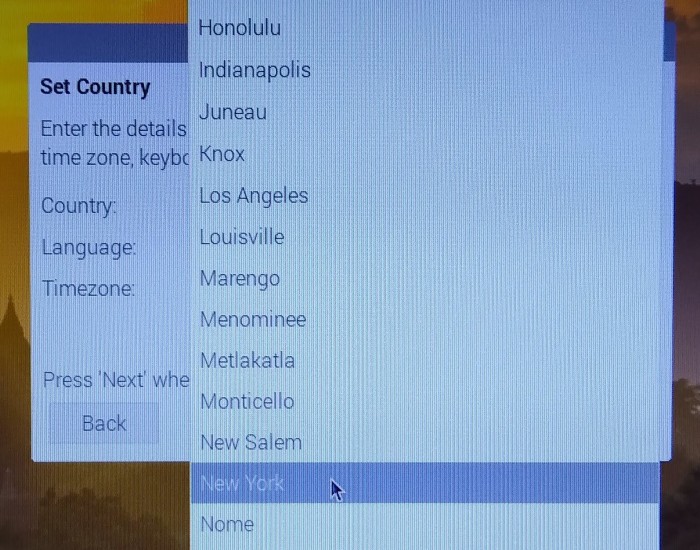
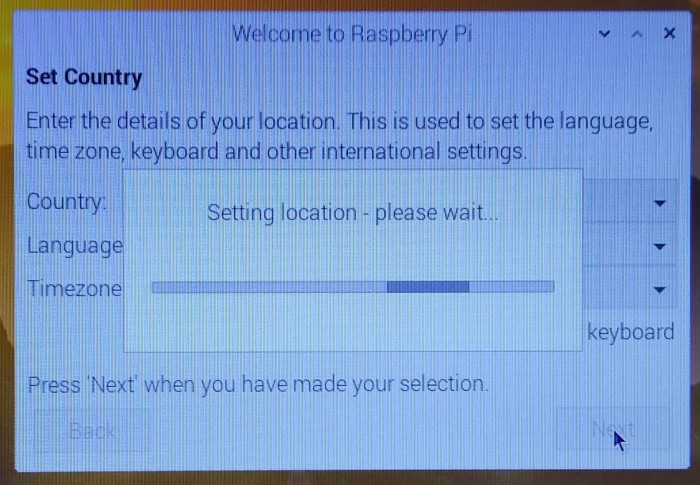
Select your country, language, and timezone (I'm in the same timezone as "New York"), and keyboard setting and click on "Next":
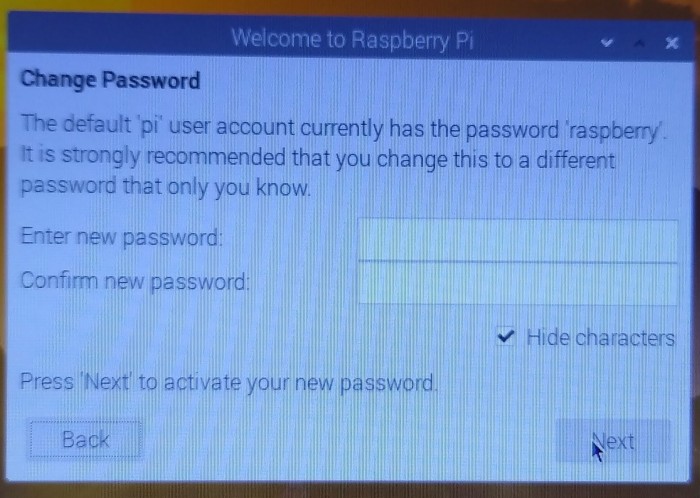
Change the default password if you'd like:
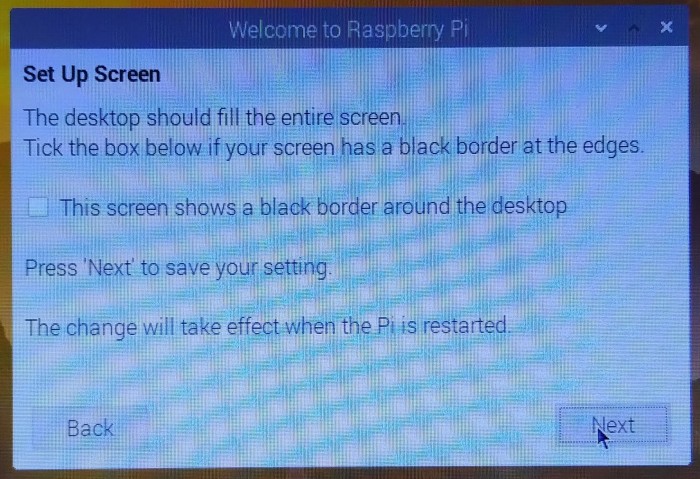
Setup the screen. If the image on the screen doesn't go all the way to the edges, click in the checkbox "This screen shows a black border around the desktop". Click on "Next":
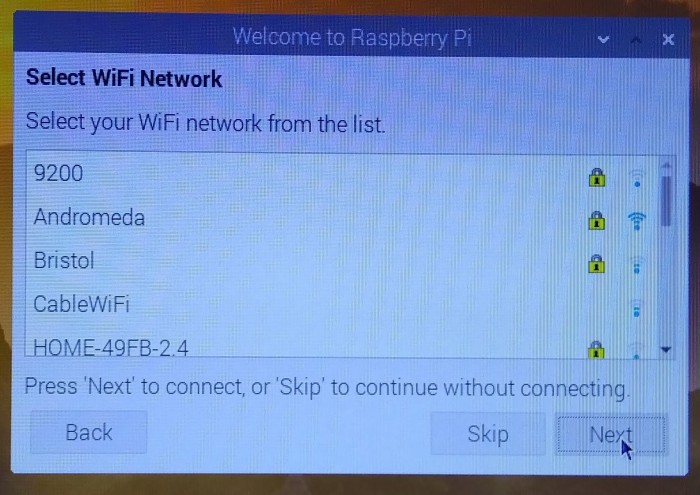
Select the WiFi network you would like to connect to. Click on "Next":
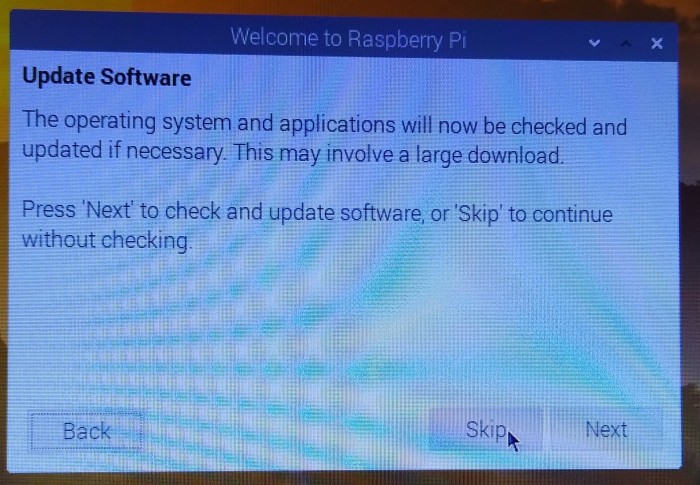
You can check for software update if you like. I skipped it, so I clicked on "Skip":
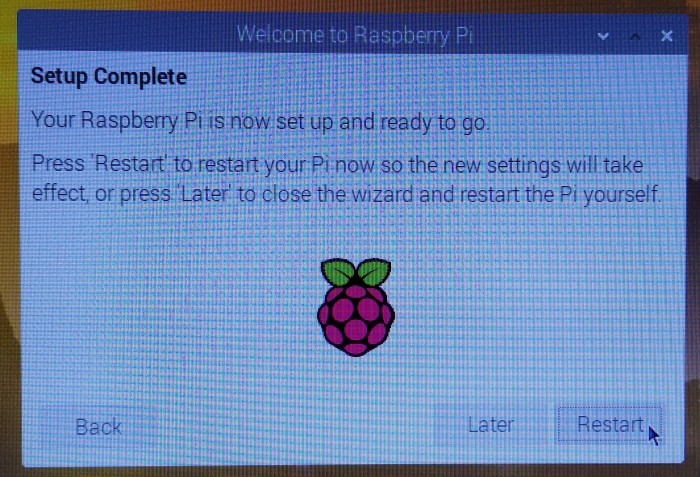
The setup is complete. Click on "Restart":
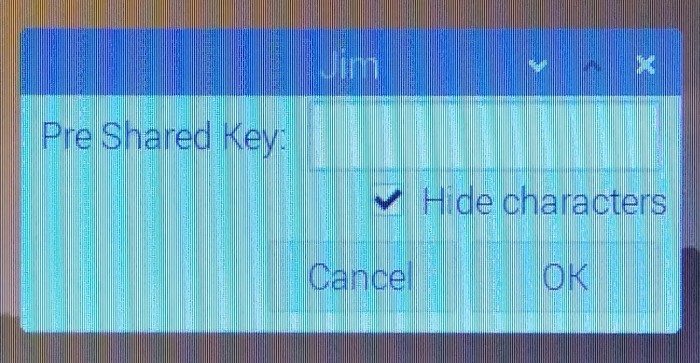
The first time the Pi connects to the selected WiFi network, it will display a dialog box for the "Pre Shared Key". Enter the WiFi password.
To see exactly which version of Linux you're running, click on the terminal icon in the menu bar, and enter the command "uname -a":

Recovery Mode
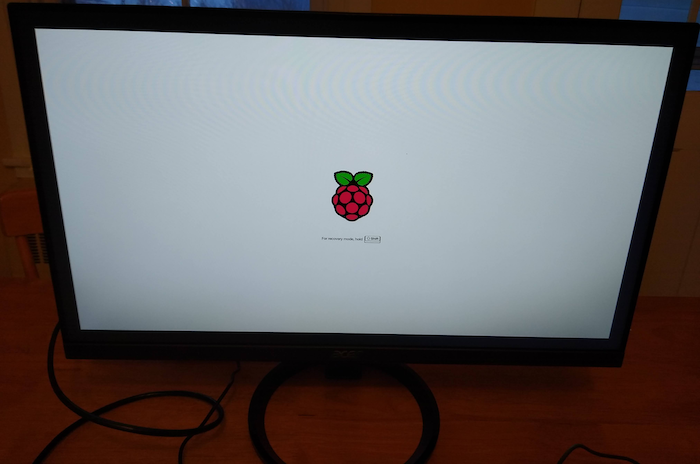
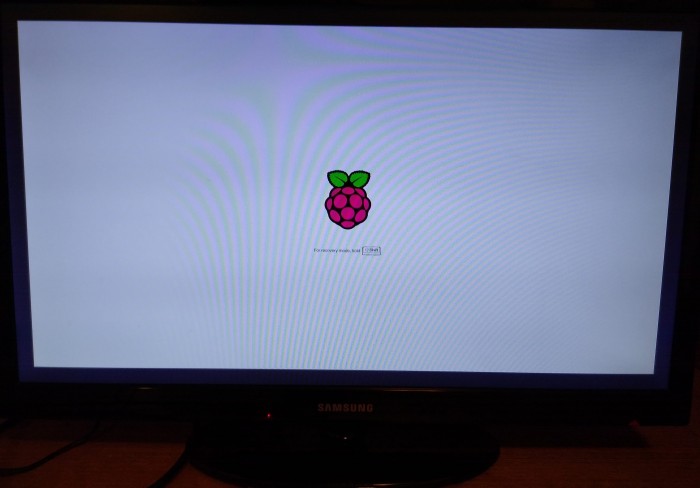
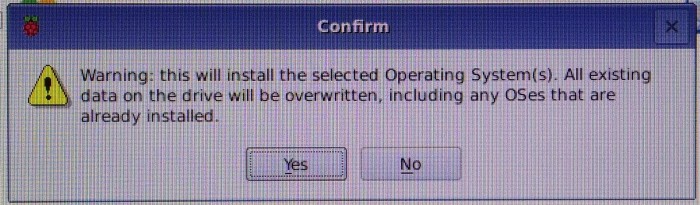
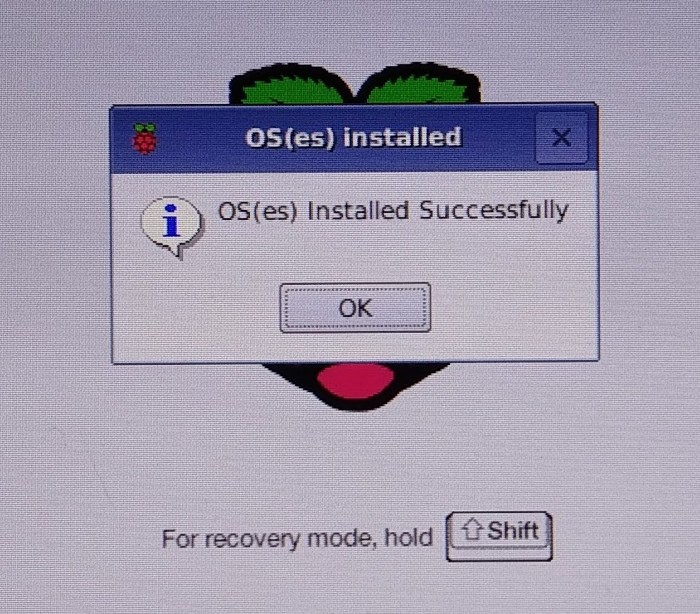
Did you notice the screen with the Raspberry Pi logo that said "For recovery mode, hold Shift", with an icon of the shift key? If you hold down the shift key at this point, rather than booting Raspbian, NOOBS will go into recovery mode.
Recovery mode allows you to recover the operating system on the memory card if something has corrupted it (on computers, corrupting means doing some kind of damage to the data, like deleting critical files, or otherwise scrambling things so that the system doesn't work right). Recovery mode also allows you to replace it with a different operating system.
The one caution about recovery mode is that it will wipe out any other data on the card. This is one of the reasons it's always good practice to make copies of your files. You should backup your files regularly, especially the ones you're using heavily. You don't want hours of work on some project to be lost because you didn't make an extra copy of the file.
If the card is still bootable (is still able to boot) and allow you to save files before doing recovery, you can do that. But if not, whatever changes you made to the files since your last copy will be lost.
When the Pi goes into recovery mode, you'll see this screen:
Then you'll get this screen, where you can choose which operating system to install. There is also an Exit icon on the top right (or you can hit the ESC/Escape key on the keyboard) to cancel recovery mode. Raspbian is selected by default.
The process takes 10-15 minutes. While it's running, the display will cycle through screens like these:

When it's finished, you'll get this screen. The Pi will boot into the newly-installed operating system when you click on "OK".
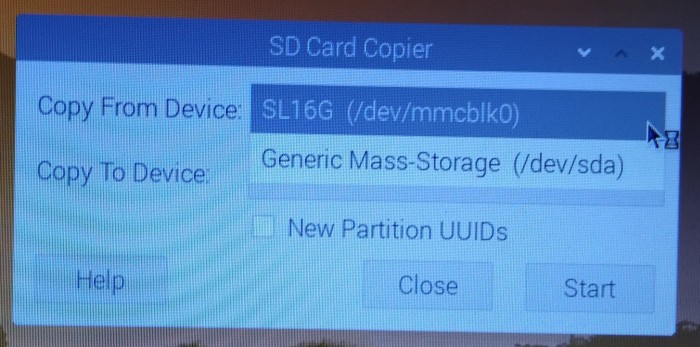
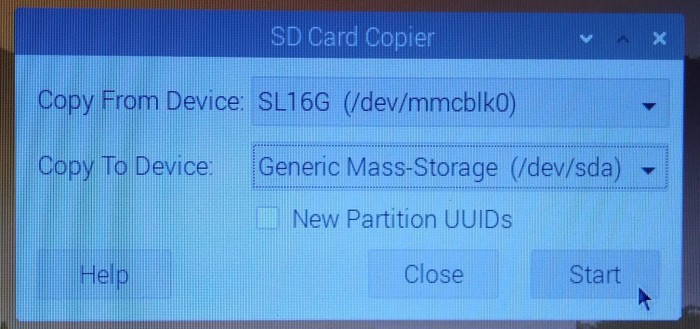
Copying The Micro SD Card
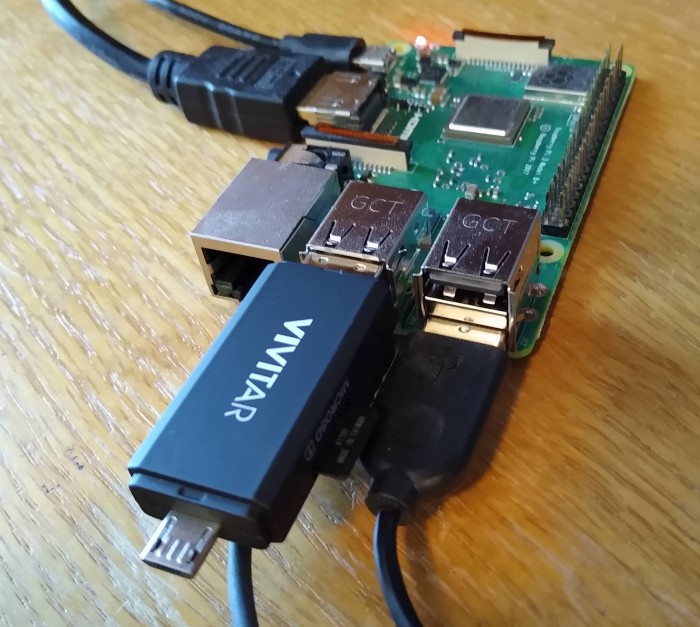
Once the Pi has rebooted after configuration, the first thing you should do is make a copy of the NOOBS Micro SD card, the one that is the current main running system card. Then you can store that card in a safe place in case you ever need to recover from it. Use the copy as your working copy and main file storage.
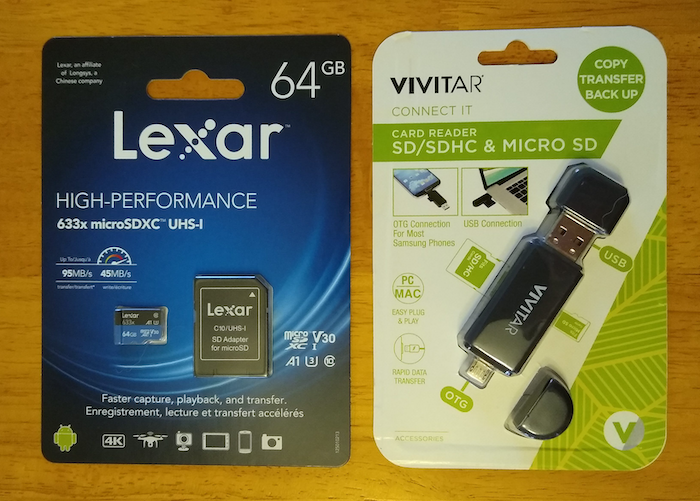
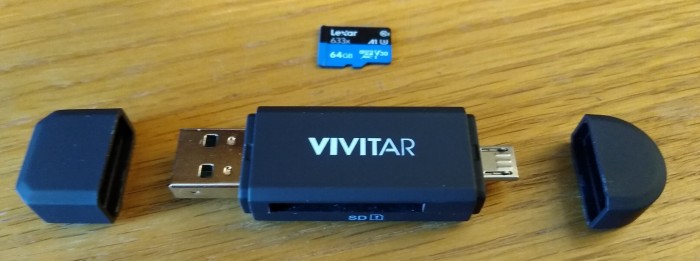
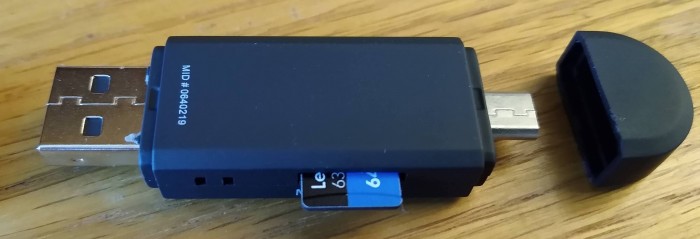
This is where you'll use the Micro SD card reader, which plugs into a USB port on the Pi. There are different styles. Mine has USB and micro USB connectors on its ends, and has two card slots, for regular SD cards on one side, and for Micro SD cards on the other side:
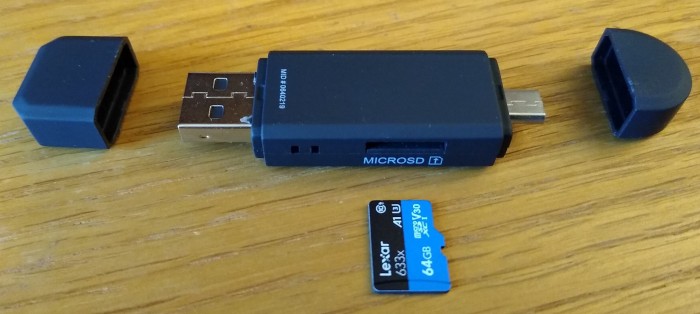
Plug the Micro SD card into the reader. Remember that these cards are keyed, so they only go in one way:


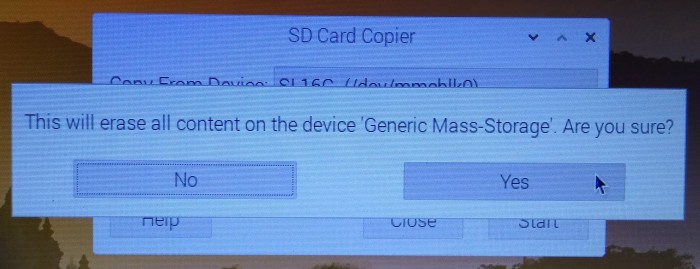

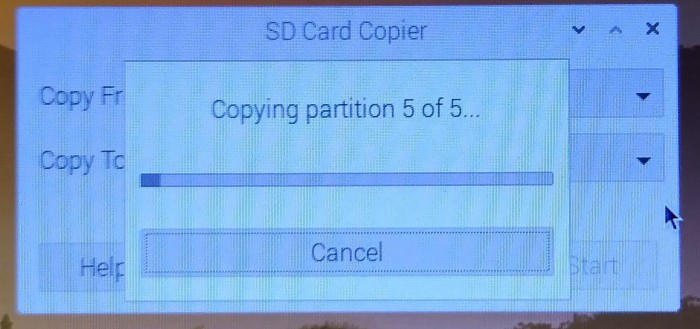
It will start copying the data from the running card to the new one, one partition at a time. It may look like it's not making progress, then suddenly go on to the next one. Mine took about 30 minutes:
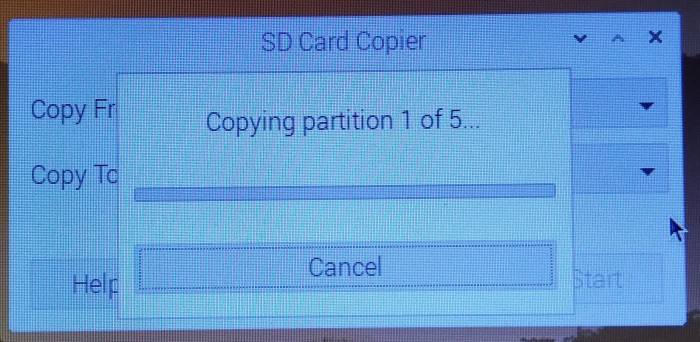
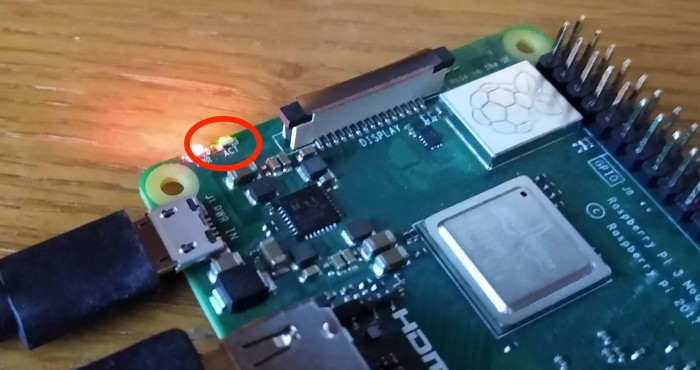
While it's running, the green ACT LED on the Pi will be flashing rapidly:
Last partition:
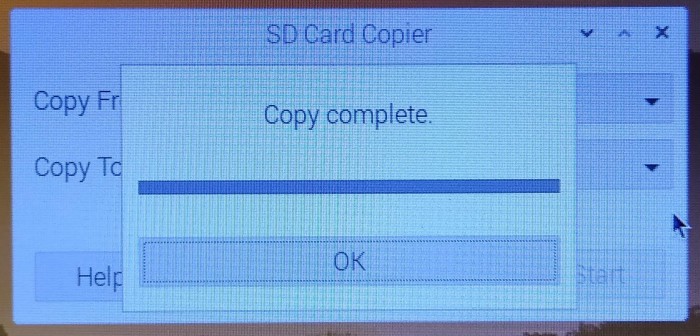
When the copy is complete, click on OK and and then click on Close:
Unplug the Pi power cord and replace the original NOOBS card with the copy. Then plug the power back in and store the original card in a safe place.
Micro SD cards are very small and easily lost, so it's good to keep them in an old pill bottle or something else that's easier to see.
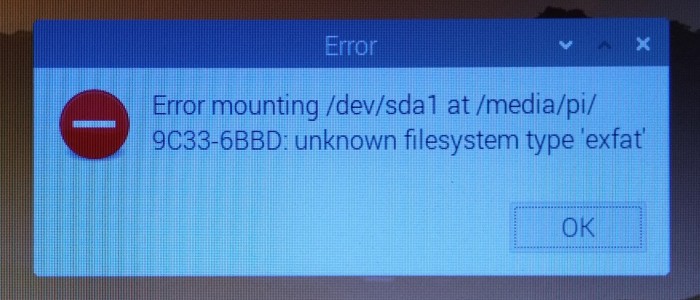
USB Sticks
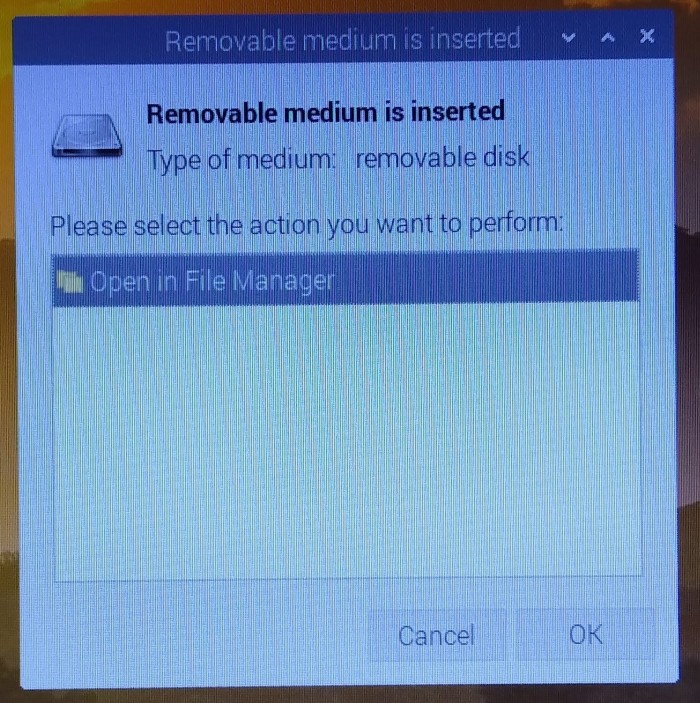
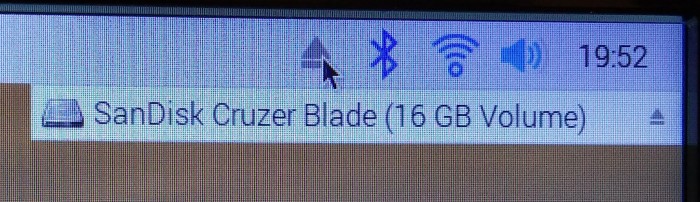
To save copies of your files or to exchange files between systems, use USB flash storage drives, known as USB sticks. When you plug one into a USB port, the Pi will display this dialog:
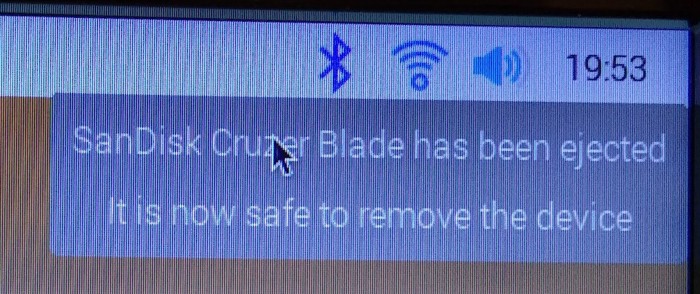
Before you remove a USB stick, you should eject it. This doesn't physically eject the stick, but it tells the software to finish writing any outstanding data to it and update the storage information on it. Then you can remove it. If you don't do that, you risk corrupting the stick, or at least the file that was written to it most recently.
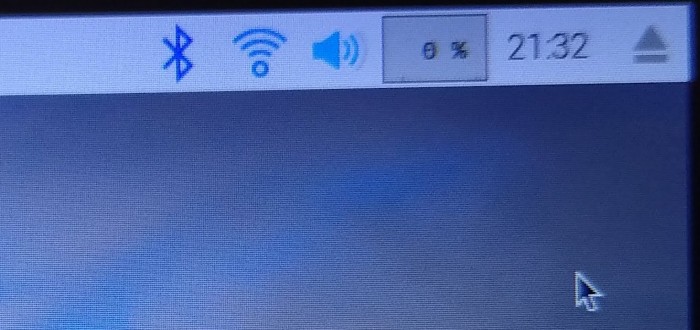
To eject it, click on the eject icon on the right end of the menu bar. The Pi will display a menu of all the removable media devices:
Click on the USB stick. Then you can remove it from the USB port:
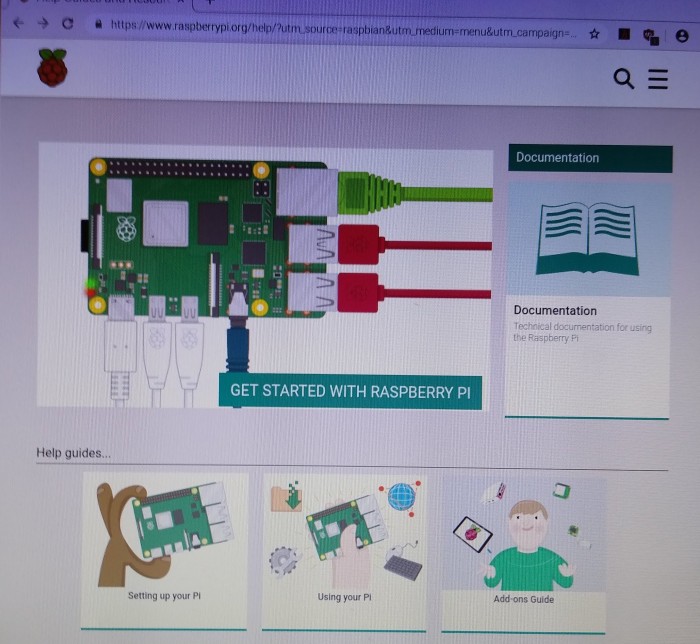
Where To Find Help
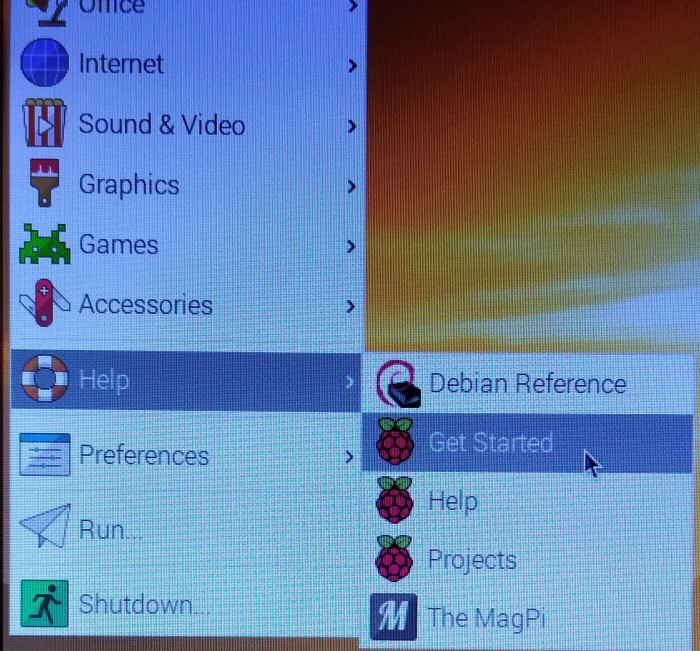
To learn more about the Pi, the first source is the Raspberry Pi Foundation's Help section, accessible through the "Help" item on the Raspberry Pi menu:
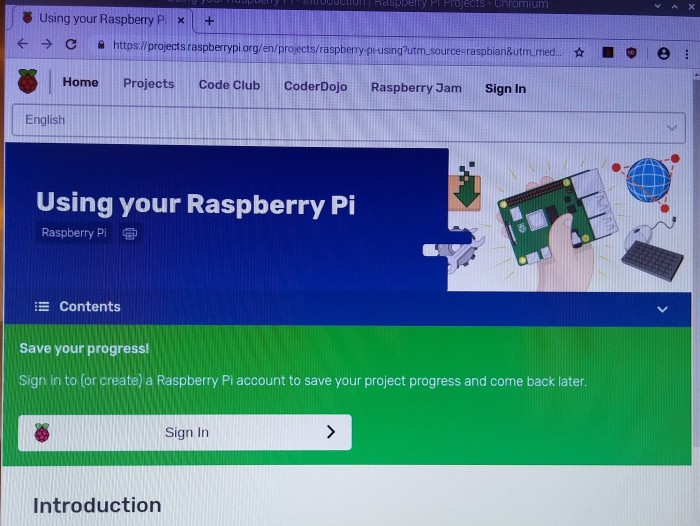
There are many additional resources as well, from blogs and informal videos to online training classes.


- Comments
- Write a Comment Select to add a comment
To post reply to a comment, click on the 'reply' button attached to each comment. To post a new comment (not a reply to a comment) check out the 'Write a Comment' tab at the top of the comments.
Please login (on the right) if you already have an account on this platform.
Otherwise, please use this form to register (free) an join one of the largest online community for Electrical/Embedded/DSP/FPGA/ML engineers:


